AI Cost-Effective Series — Model Tiering: 4 Tiers Cover 90% of Dev Tasks
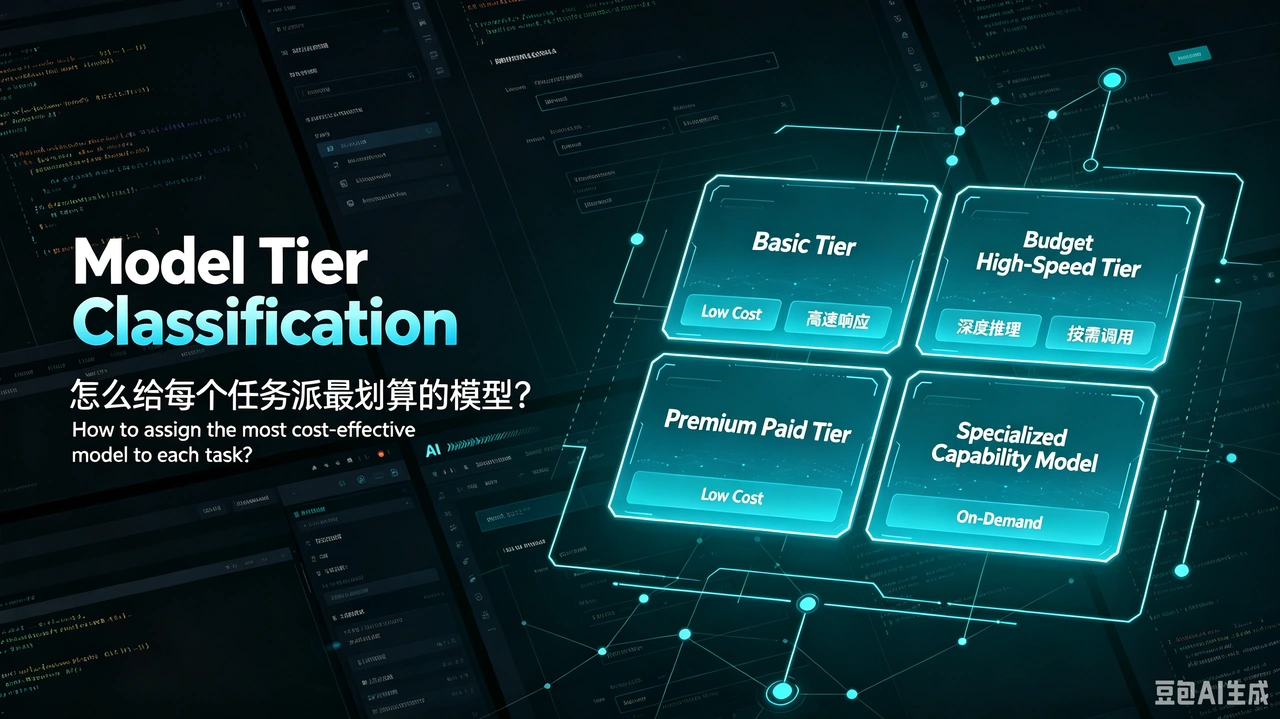
One-line conclusion: tier models by cost into Base / Budget / Premium / Specialised and match tasks to tiers — 90% of daily dev scenarios are covered by cheap tiers, so you can keep both your bill and your experience healthy.
Why this is worth reading
Every time you open a new task, do you find yourself agonizing over “which model should I send this to?” Pick the expensive one and you worry you’re wasting money; pick the cheap one and you worry about quality. That agonizing is itself a hidden cost — every moment of hesitation burns your time, and the cost scales linearly with your task volume.
The question is not “which model is strongest” — it’s “does this task actually deserve an expensive model?” In practice you’ll find that the vast majority of everyday tasks are perfectly fine on the free or budget tier; only a minority genuinely need a premium model. Get the tiers straight and you can keep both the bill and the experience in good shape.
This post gives you a “task → model tier” lookup table, a set of matching rules you can copy directly, and a real-world case: during a CodeBuddy code review, the platform automatically spawned a sub-agent and dispatched it to a cheap model. This post only covers model tiering and matching — cross-platform price comparison is a separate topic.
What you’ll learn
- Divide models into cost tiers (Base / Budget / Premium / Specialised) and match tasks to tiers to cut costs.
- Base/cheap models are good enough for the vast majority of daily tasks; gaps are closed by AI-Skill constraints and small fixes.
- Let the platform auto-spawn sub-agents for review — it will pick cheaper models (even different ones) to review for you, saving more tokens.
Background and the selection mindset
Model selection is essentially a “cost × quality × speed” trade-off. Classifying your daily tasks into these four tiers is the fastest way to get results:
| Tier | Example models | Cost profile | Typical scenarios |
|---|---|---|---|
| Base | Hy3 | Lowest cost tier | Code reading, log analysis, doc sync, basic CR |
| Budget high-speed | DeepSeek-V4-Flash | Low cost tier | Link tracing, CI builds, test execution, blog drafts |
| Premium paid | DeepSeek-V4-Pro / Claude | High unit price tier | Architecture design, hard refactors, technical breakthroughs |
| Specialised capability | Multimodal GUI, Doubao | On-demand | GUI development, image processing, data analysis |
Rule of thumb: first ask “is this task’s output good enough on the Base/Budget tier?”, and only step up if not. The vast majority of dev actions land in the first two tiers; the premium tier is reserved for the few tasks that genuinely need deep reasoning.
Solution overview: match tasks to tiers + script the fixed flows
Precise task-matching rules (task → tier):
- Base/Budget: code reading, link tracing, trace completion, doc sync, basic CR, CI builds, test execution, blog drafts, standalone review agents.
- Premium: architecture design, solution decisions, hard refactors, core breakthroughs, multi-step deep reasoning.
- Specialised: GUI development (multimodal), image/data analysis (Doubao, etc.).
Tiering is not paper theory — mainstream AI IDEs already ship multi-model tier selection UIs, letting you assign different tiers to different tasks:
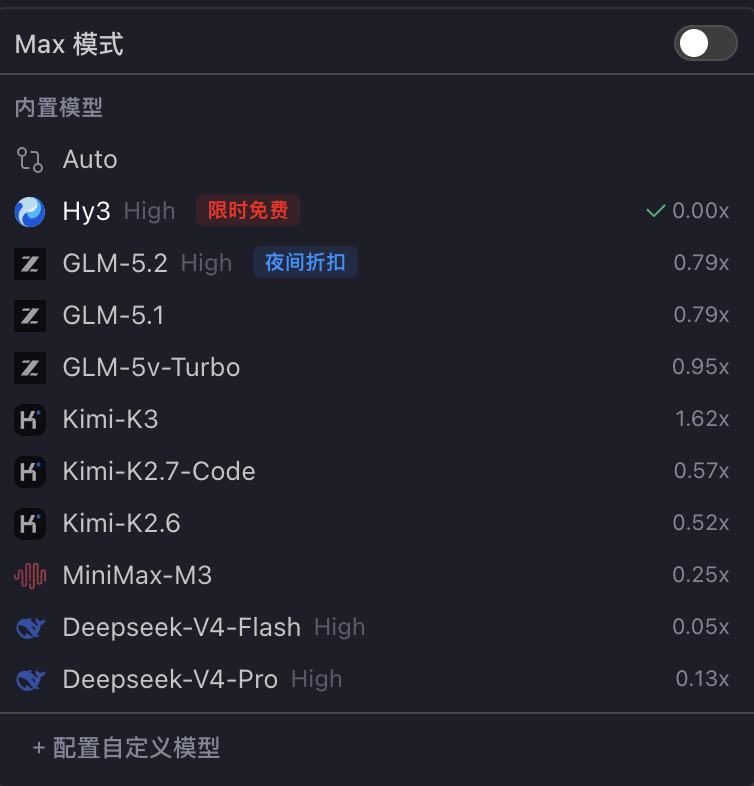
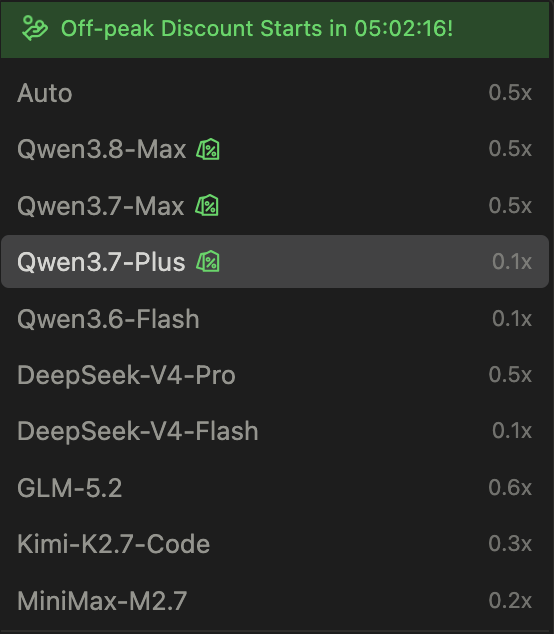
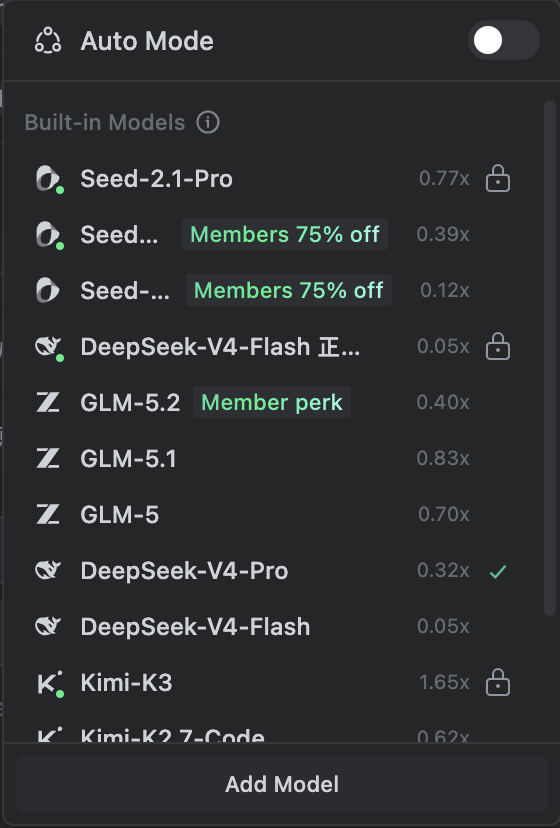
One more layer of savings: script the fixed flows. Picking the right tier is only step one. Even on the Base tier, if you make AI re-reason through a fixed flow every time, reasoning tokens remain a hidden cost center. Turn release checks, lint, changelog generation, and similar flows into scripts so AI only orchestrates instead of re-reasoning — the bill drops further.
Impact: the cost structure of one real code review
Let’s see how “tiering + dispatch” actually lands, using a real code review on CodeBuddy:
In my skill I asked “spawn a sub-agent for code review once the task is done” — so the review wasn’t started manually; the skill triggered it automatically. CodeBuddy doesn’t brute-force the review with the main model. Instead it spawns a sub-agent to review, and that sub-agent gets dispatched to a cheaper model (rather than defaulting to the same premium model) — coding and review each take their most cost-effective tier.
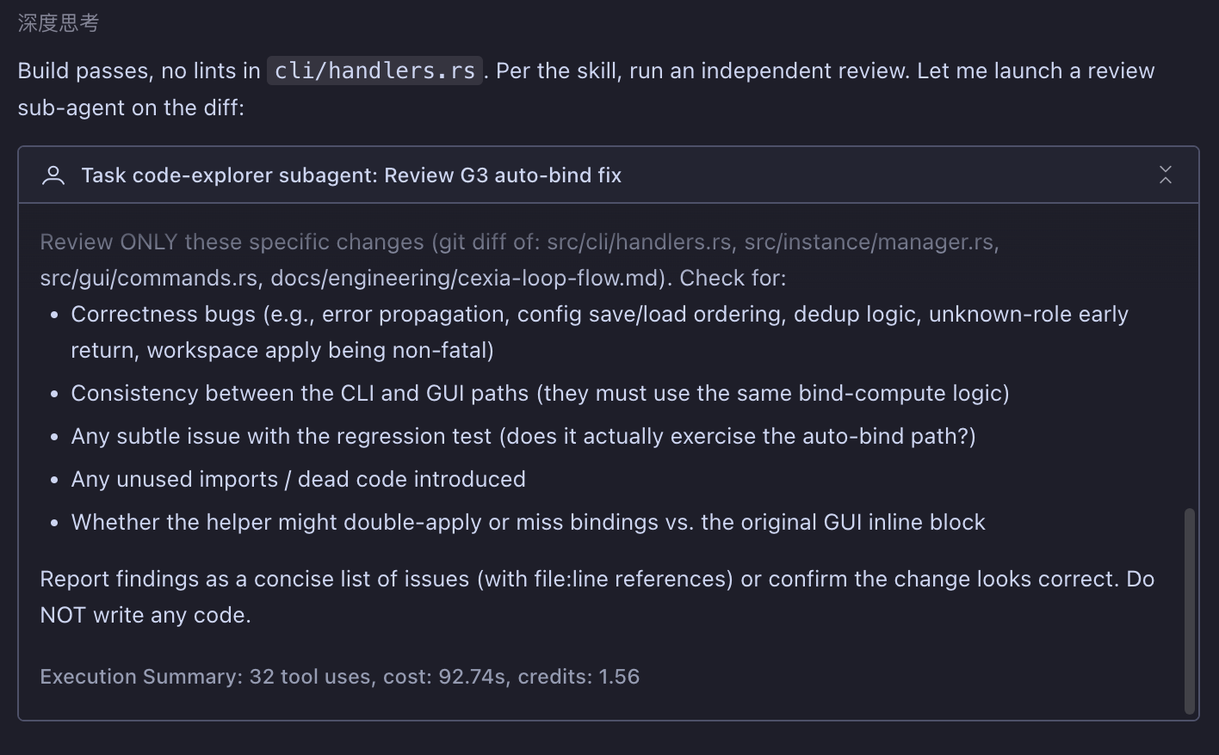
This round’s cost structure:
- Coding: main coding ran on the Base tier (Hy3).
- Code review: handled by the auto-dispatched sub-agent on a cheaper model (DeepSeek-Flash here).
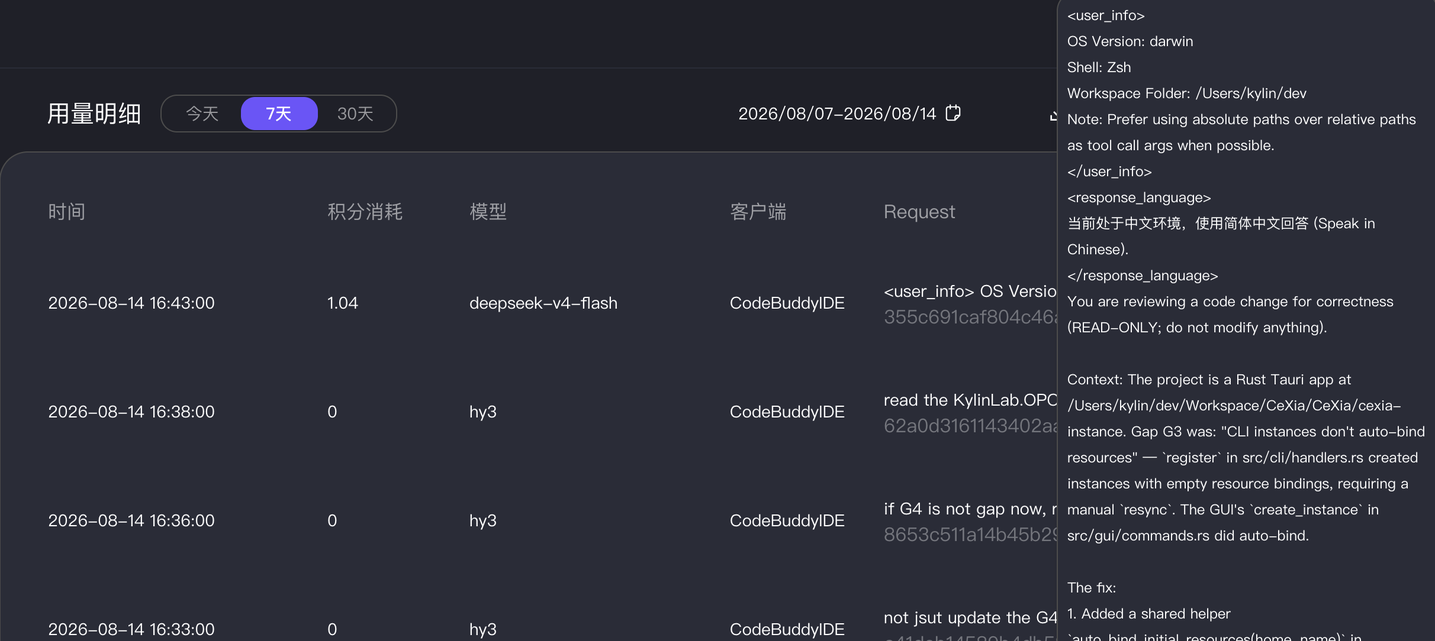
Keep this direction in mind: for the same “code + review” job, tiering and dispatch bring the cost from “premium model end-to-end” down to “Base-tier coding + cheap-model review”.
Who does the dispatch? A bucket of cold water on Auto mode
The above is the platform auto-spawning form of dispatch, but automatic doesn’t mean optimal. Every major platform has an Auto mode, and my hands-on results were underwhelming:
- Before you’ve figured things out, Auto may beat randomly picking yourself — but its benefit is conditional: when the platform isn’t busy, Auto may pick models based on task needs, so at least it won’t pile every task onto the premium model. Once it gets busy, though, it dispatches purely by load, and task fit goes out the window.
- Once you understand the task structure and know the best match, choosing yourself is strictly better — Auto gives you “good enough”; manual selection gives “just right”.
- When building your own code review task, you must specify the model yourself; CLI automation tasks can also select models explicitly — no need to leave it to Auto’s guessing.
So don’t treat “auto dispatch” as the finish line. Treat it as a crutch for the onboarding phase: use it while observing which tier each task really belongs to; once the “task → model” map in your head is clear, switch back to manual selection — that’s the truly fine-grained state.
Reproduction checklist
- Take your 10 most frequent tasks and assign each to one of the four tiers.
- Move “code reading / basic CR / link tracing” to the Base or Budget tier.
- Keep a dedicated premium-model entry for “architecture design / hard refactors”.
- When you start a code review, watch whether the platform auto-spawns a sub-agent and dispatches it to a cheaper model; also try manually specifying the review model in a task / CLI and compare the two.
Summary
- Divide models into Base / Budget / Premium / Specialised and match each task to its tier — 90% of daily scenarios are covered.
- Base/cheap models are good enough for daily work; quality gaps are closed by AI-Skill constraints and small fixes — no need to reach for premium by default.
- For jobs like code review, the platform auto-spawns sub-agents and dispatches them to cheaper models, so coding and review each take their most cost-effective tier; but Auto mode tested poorly — before you understand your tasks it prevents random picks, but once you know the structure, manual selection (available in both task and CLI) is the better answer.
Don’t rush to switch models. Spend ten minutes putting your recent high-frequency tasks into four tiers — the optimization space in this month’s bill will already be visible.
Related posts in this series:
- AI Cost-Effective Series — Opening: Why You Should Rethink and Choose AI Smartly